
Unlock Your Bike's Electric Potential
Imagine transforming your familiar bicycle into a powerful, sweat-free electric vehicle for a fraction of the cost of a new e-bike. An electric bike kit with battery makes this possible, representing the ultimate upgrade for cyclists seeking versatility and modern convenience. This comprehensive guide will walk you through everything from component selection to installation, empowering you to make an informed decision. We'll explore how this innovative approach lets you customize performance while upcycling your trusted bike, blending sustainability with smart technology.
The market for e-bike conversion has surged as commuters and enthusiasts discover its value. Instead of discarding a perfectly good bicycle, you retrofit it with a motor, battery, and controller. This process not only saves significant money but also delivers a deeply personalized riding experience. You retain the frame you love while gaining electric assist for hills, headwinds, and longer distances.
Leading this movement are brands like Gyroor, a trusted name in personal electric transport with over 100,000 riders across North America and Europe. Their focus on UL-certified battery safety and robust engineering provides a blueprint for what to look for in a quality conversion kit. Whether your goal is a easier commute, extended recreational rides, or simply keeping up with faster friends, an electric bike kit with battery is the key.
This article will serve as your definitive manual. We'll dissect the benefits, compare technical specifications, and provide a realistic overview of the installation process. By the end, you'll understand why choosing the right electric bike kit with battery is a transformative decision for your cycling life.
What is an Electric Bike Conversion Kit?
An electric bike conversion kit is a packaged set of components that electrifies a standard bicycle. At its core, every kit includes a motor to provide propulsion, a battery to store energy, a controller to manage power flow, and an interface for the rider. The concept is elegantly simple: these parts integrate with your existing bike to create a pedal-assist (pedelec) or throttle-controlled hybrid vehicle.
The motor is the heart of the system. It's typically installed in one of two locations: built into the hub of a wheel (front or rear) or mounted at the bike's crank bracket as a mid-drive unit. The battery, often the most expensive component, is usually a lithium-ion pack mounted on the frame. The controller, a small electronic brain, connects everything, interpreting signals from pedaling sensors or a throttle to deliver the requested power from the battery to the motor.
Modern kits are remarkably user-friendly. Many include a handlebar-mounted display showing speed, battery level, assist mode, and distance. Cadence or torque sensors detect your pedaling effort and automatically engage the motor for a seamless boost. This integration means you can choose to pedal normally, use pure electric power with a throttle, or enjoy a blend of both.
Understanding these basic components demystifies the conversion process. It's not magic; it's accessible technology designed to augment human power. A well-chosen electric bike kit with battery doesn't replace the cycling experience—it enhances it, removing barriers and expanding possibilities.
Key Benefits of Converting Your Bike with a Kit
Choosing to install an electric bike kit with battery offers compelling advantages over purchasing a complete, factory-built e-bike. The benefits extend beyond simple cost savings to encompass environmental impact, personalization, and practical ownership.
First, the financial argument is powerful. A high-quality conversion kit from a reputable brand represents a significant upfront saving compared to a new e-bike of similar specification. You're paying for the drive system alone, not an entire second bicycle. This allows riders to access premium motor and battery technology at an entry-level price point.
Second, conversion is a sustainable choice. It extends the lifecycle of your existing bicycle, keeping a functional frame out of the waste stream. Manufacturing a new bike frame has a substantial carbon footprint; by reusing yours, you dramatically reduce the environmental impact of your upgrade. It's the epitome of the "reduce, reuse" principle applied to personal transport.
Third, customization is unparalleled. When you buy a pre-built e-bike, you accept a manufacturer's compromise on motor power, battery placement, and component integration. With a kit, you select the specific motor torque, battery capacity, and features that match your exact needs—be it conquering steep hills, achieving maximum range, or prioritizing stealthy aesthetics.
Finally, there's the satisfaction and knowledge gained from a DIY project. Successfully converting your bike builds mechanical confidence and a deeper understanding of how your vehicle works. This knowledge is invaluable for troubleshooting and maintenance down the line. The result is a unique e-bike that feels truly yours, both in its creation and its performance.
Cost-Effectiveness & Sustainability
The cost differential is stark. A reliable new entry-level e-bike often starts between $1,200 and $1,800. A comprehensive hub motor conversion kit with a quality battery, from a brand like Gyroor, typically ranges from $500 to $900. For riders who already own a suitable donor bike, the savings are immediate and substantial, often 40-60%.
This economic model allows you to invest more directly into the core technology—the battery and motor—rather than into a duplicate frame, wheels, and components. If your current bicycle has high-quality brakes, gearing, or a comfortable saddle, you preserve that value. The upgrade is focused precisely where the electric functionality is added.
From a sustainability perspective, the impact is clear. The production of aluminum or carbon fiber frames is energy-intensive. By converting, you prevent the disposal of your old bike and defer the environmental cost of producing a new one. It's a practical form of urban recycling that reduces demand for raw materials and manufacturing energy.
Furthermore, should any part of the conversion kit fail, it can be replaced individually. In a pre-built e-bike, a proprietary motor or battery failure might render the entire bike difficult or expensive to repair. The modular nature of kits promotes repairability and long-term usability, aligning with a circular economy mindset.
Customization & Performance Tuning
Customization begins with motor selection. Need brute force for San Francisco-style hills? A high-torque 750W rear hub or mid-drive might be your choice. Prioritizing a discreet look for a lightweight road bike? A sleek 250W front hub motor could be ideal. Kits offer this choice; pre-built bikes do not.
Battery choice is equally personal. You select the capacity (measured in Amp-hours or Watt-hours) based on your required range. A long-distance tourer might opt for a 48V 17.5Ah (840Wh) battery, while a short-range commuter could choose a 36V 10.4Ah (375Wh) pack for reduced weight and cost. You also choose the mounting style—downtube, rear rack, or triangle—to suit your bike's geometry and your aesthetic preference.
Performance tuning extends to the user interface. Many kit controllers allow adjustment of parameters like maximum speed, pedal assist sensitivity, and regenerative braking strength via smartphone apps or display menus. This level of fine-tuning is rarely available on off-the-shelf e-bikes, which are locked to comply with regional regulations out of the box.
The result is a vehicle tailored to your physiology, your local terrain, and your riding style. This tailored approach ensures the electric assist feels like a natural extension of your own power, rather than a one-size-fits-all addition that may not match your needs.
How to Choose the Right Electric Bike Kit for You
Selecting the perfect electric bike kit with battery requires a systematic assessment of your bike, your riding needs, and the technical specifications on offer. This decision matrix ensures compatibility and satisfaction.
Start by evaluating your donor bicycle. Is it in good mechanical condition? The frame, wheels, and brakes must be sound to handle increased speeds and weight. Measure your wheel size (e.g., 26", 700c), your rear dropout width (standard is 135mm for most mountain/hybrid bikes), and examine your frame's main triangle to see where a battery might mount.
Next, define your primary use case. Is it for a flat urban commute, hilly trail adventures, or cargo hauling? Distance, average gradient, and load weight are the critical factors that will dictate necessary motor power and battery capacity. Be realistic about your needs to avoid over- or under-spending.
Finally, research brands and their support ecosystems. A kit from a reputable company like Gyroor comes with a clear warranty, detailed installation manuals, and accessible customer support. Prioritize kits with UL-certified or similarly recognized batteries, as this is the single most important safety feature. Water resistance ratings (IP codes) are also crucial for all-weather riders.
By following this structured approach—bike assessment, need analysis, and brand vetting—you can confidently narrow the vast market down to the few kits that are truly right for you. The goal is a seamless integration that feels OEM, not an awkward afterthought.
Motor Type and Placement: Hub vs. Mid-Drive
The choice between a hub motor and a mid-drive motor is the most significant technical decision in your conversion. Each has distinct advantages and ideal use cases.
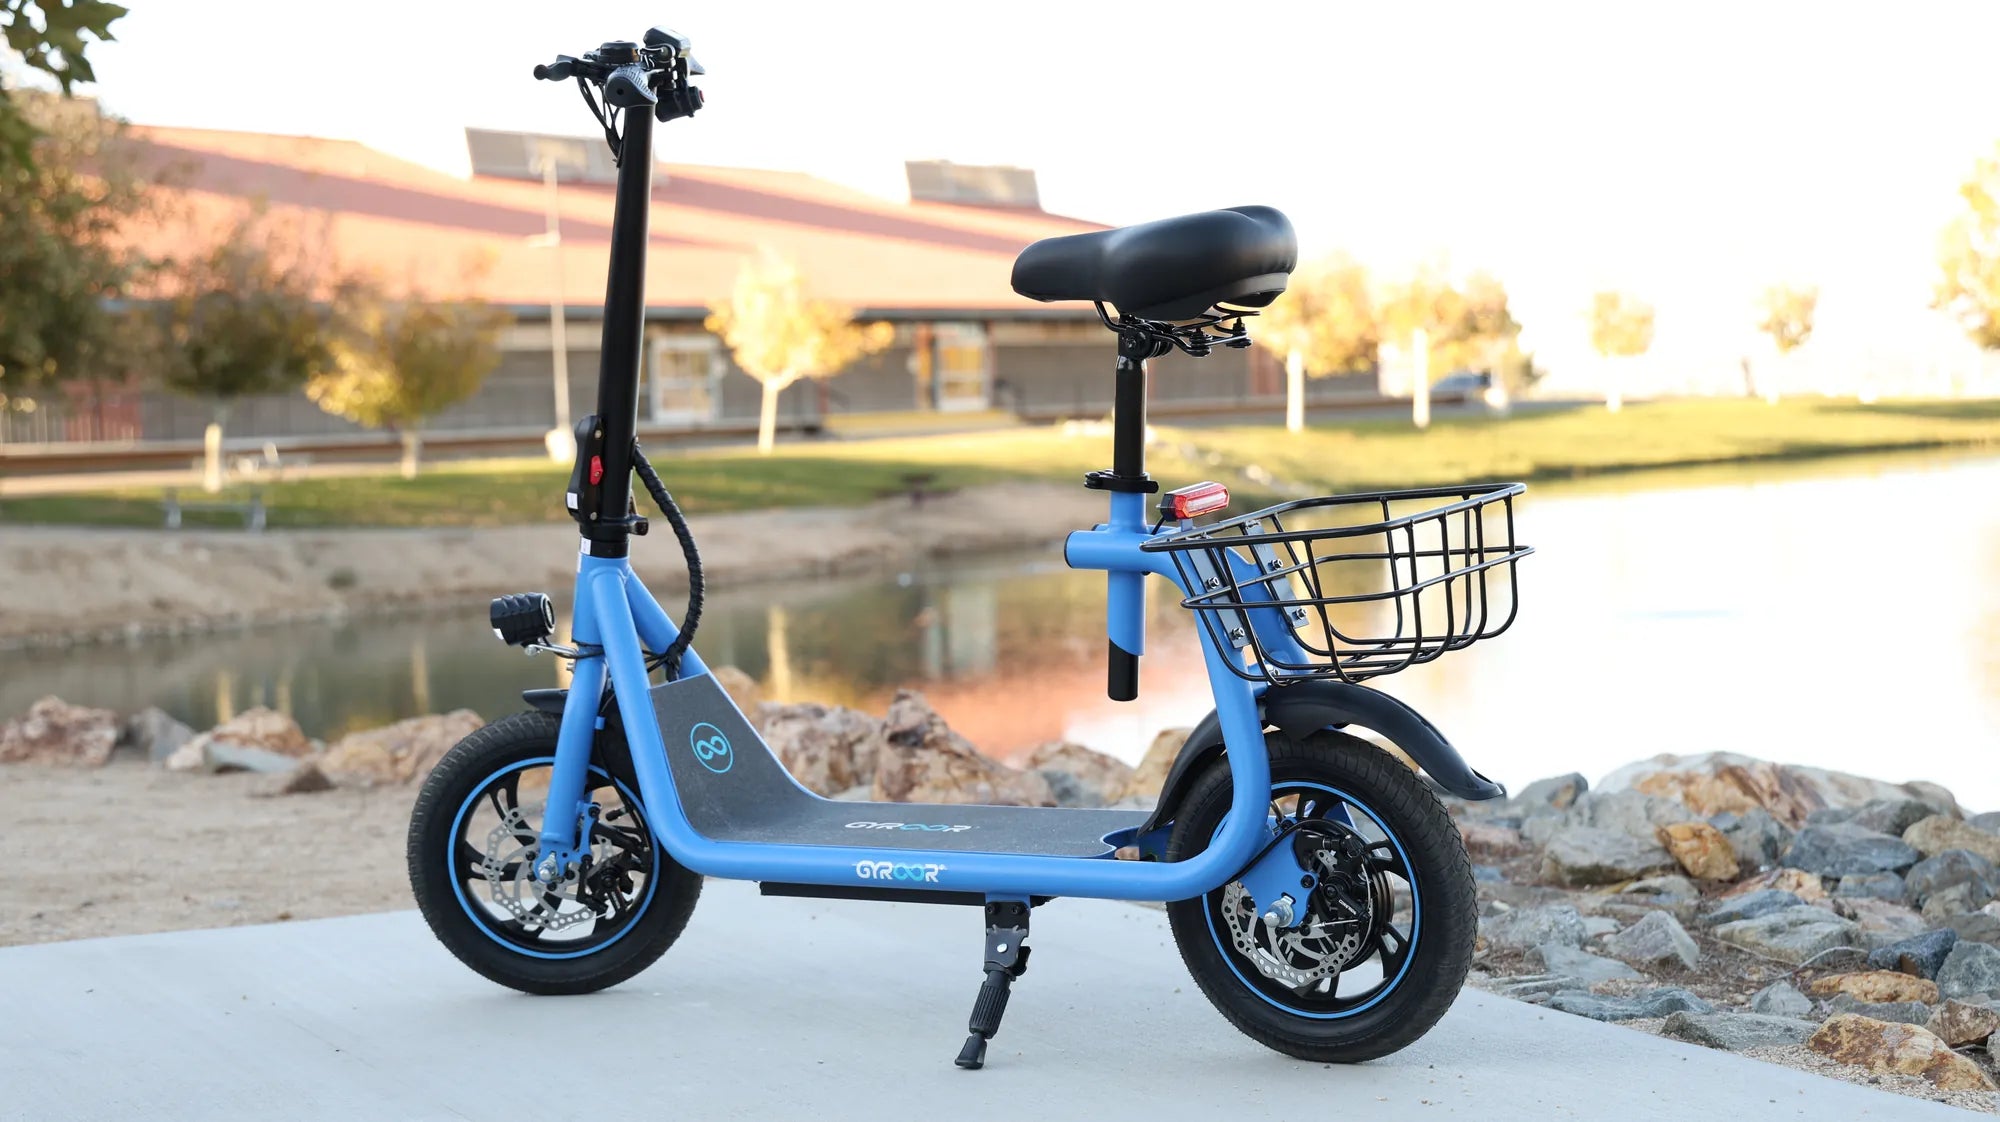
Hub Motors are the most common in conversion kits due to their simplicity. The motor is housed inside the center of the front or rear wheel. Installation often involves swapping your existing wheel for the motor wheel. Hub motors are generally more affordable, quieter, and require minimal modification to the bike's drivetrain. They provide direct power to the wheel, which is excellent for steady cruising and flat-to-rolling terrain. Many Gyroor kits utilize reliable rear hub motors, offering a balanced, user-friendly experience.
Mid-Drive Motors are mounted at the bike's bottom bracket, where the crank arms are. They drive the bicycle's chain, thereby leveraging the bike's existing gears. This makes them exceptionally efficient on steep hills, as you can downshift to climb with high motor torque at low RPM. They centralize weight and offer a more natural, balanced ride feel. However, they are typically more expensive, complex to install (often requiring specific bottom bracket standards), and place more stress on the chain and cassette.
The following table summarizes the key differences:
| Feature | Hub Motor | Mid-Drive Motor |
|---|---|---|
| Cost | Generally lower | Generally higher |
| Installation Complexity | Easier (wheel swap) | More complex (crank/bracket work) |
| Hill Climbing Efficiency | Good (power dependent) | Excellent (uses bike's gears) |
| Weight Distribution | Weight in wheel (can affect handling) | Central, low weight (improves handling) |
| Drivetrain Wear | Minimal | Increased (chain, cassette) |
| Best For | Commuting, flat terrain, DIY beginners | Steep hills, off-road, technical riding |
For most first-time converters seeking a reliable, cost-effective electric bike kit with battery, a rear hub motor system presents the optimal balance of performance, ease, and value.
Battery Specifications: Voltage, Amp-Hours, and Safety
Battery specifications determine your e-bike's potential power and range. Understanding the basics of voltage (V) and amp-hours (Ah) is essential for making an informed choice.
Voltage (e.g., 36V, 48V) can be thought of as the "pressure" of the electrical system. Higher voltage generally allows the motor to produce more power and higher top speeds, all else being equal. A 48V system will feel more powerful and responsive than a 36V system with the same motor winding.
Amp-Hours (Ah) represent the battery's capacity, or how much current it can deliver over time. Think of it as the size of the fuel tank. A 10Ah battery can deliver 10 amps of current for one hour under ideal conditions. More importantly, multiply Voltage by Amp-Hours to get Watt-hours (Wh), the true measure of total energy storage. A 48V 10Ah battery has 480Wh of energy.
For range estimation, a rough rule is to divide the Wh rating by 20 for a conservative estimate in miles (or by 15 for a more aggressive estimate). A 480Wh battery might therefore deliver 24-32 miles of range, depending on assist level, terrain, and rider weight.
Safety is non-negotiable. The battery is the component with the highest inherent risk if poorly made. Insist on packs from reputable brands that use high-quality, name-brand lithium-ion cells (like Panasonic, LG, or Samsung) and include a Battery Management System (BMS). The BMS protects against overcharge, over-discharge, short circuits, and temperature extremes. Crucially, look for independent safety certifications. Gyroor's use of UL-certified battery packs, tested for over 500 charge cycles, sets the standard for what to look for—providing peace of mind that the pack is engineered for safety and longevity.
Compatibility Check: Your Bike's Frame and Brakes
A successful conversion hinges on physical compatibility. A few precise measurements can prevent ordering the wrong kit.
Wheel Size & Dropout Width: For hub motor kits, you must order a wheel built to match your bike's rim size (e.g., 26", 27.5", 700c). The motor axle must also fit your frame's fork (front) or rear dropout spacing. Common rear dropout widths are 135mm (MTB/Hybrid) and 130mm (Road). Thru-axle frames require specialized kits.
Frame Space for Battery: Most battery packs mount on the downtube or within the main triangle. Use a tape measure to check the length and width of these spaces. Ensure there is enough clearance for the specific battery model you're considering, and that mounting holes or brackets will align.
Brake Type: If your kit includes a motor cutoff sensor (which stops motor power when you brake), you need to ensure sensor compatibility. There are sensors for mechanical (cable) disc brakes, hydraulic disc brakes, and rim brakes. Verify which type your bike uses. This is a critical safety feature that should not be overlooked.
Bottom Bracket & Crankset (for Mid-Drives): Mid-drive installations require specific bottom bracket shell widths and threading (e.g., 68mm, 73mm BSA). You may also need to replace your crankset. Consult the kit manufacturer's detailed compatibility charts before purchase.
Taking the time to perform this compatibility audit ensures a smooth installation process and a professional-looking final product. When in doubt, contact the kit seller's support team with photos and measurements of your bike.
The Installation Process: What to Expect
Installing an electric bike kit with battery is a manageable project for anyone with basic mechanical aptitude and the right tools. Setting realistic expectations is key to a positive experience.
For a typical rear hub motor kit, plan for a 2 to 4-hour installation window if you are methodical. The process is not overly complex but involves several sequential steps: removing the existing rear wheel, installing the motor wheel, mounting the battery and controller, routing and connecting all cables, installing the display and sensors, and finally testing and tuning the system. A clean, organized workspace is essential.
Professional installation is a wise option for those uncomfortable with bike mechanics, for complex mid-drive kits, or for bikes with integrated or proprietary components. Many local bike shops now offer conversion services. The cost is worthwhile for the assurance of correct torque settings, proper cable management, and overall safety.
The quality of the installation manual is a telling sign of the kit's quality. A good manual from a brand like Gyroor will have clear, step-by-step photos or diagrams, a detailed wiring guide, and torque specifications for critical bolts. Online video tutorials from the manufacturer or the user community are invaluable supplemental resources.
Ultimately, the installation is a rewarding bridge between your old bike and its new electric identity. The care you put into this process pays dividends in the reliability, safety, and neatness of the finished conversion.
Tools You'll Need and Pre-Installation Tips
Gathering the correct tools before starting will make the process smoother. While kits often include specialized wrenches for the motor axle nuts, you will need your own set as well.
Essential Tools: A set of metric hex wrenches (Allen keys), combination wrenches (typically 13-19mm), needle-nose pliers, wire cutters/strippers, electrical tape, zip ties for cable management, a torque wrench (recommended for critical bolts like motor axle and battery mounts), and a pedal wrench if removing cranks. A bike stand is extremely helpful but not absolutely required.
Pre-Installation Bike Prep: Before touching the kit, give your donor bike a thorough inspection and tune-up. Check tire condition and inflation. Ensure brakes are properly adjusted and pads have sufficient life. Lubricate the chain and check gear indexing. Fix any pre-existing issues like loose bearings or worn components. Converting a bike in poor mechanical condition is a safety risk.
Workspace Setup: Choose a well-lit area with ample floor space. Lay down a mat or old sheet to protect components and make dropped small parts easier to find. Organize kit parts as you unpack them, grouping related items together. Read through the entire manual once before turning a single wrench to understand the full sequence.
Safety First: Never cut or splice battery wires while the battery is connected. Always disconnect the battery before working on any electrical connections. During initial testing, lift the motor wheel off the ground for the first power-on to ensure it spins freely in the correct direction before riding.
Gyroor Conversion Kits: Engineered for Confidence
When navigating the market for an electric bike kit with battery, choosing a brand with a proven track record in safety and reliability is paramount. Gyroor brings its experience from the electric scooter and e-bike market to the conversion kit space, focusing on core engineering principles that build rider confidence.
The foundation of this confidence is battery safety. Gyroor's commitment to using UL-certified battery packs cannot be overstated. This independent certification verifies that the battery design, cell quality, and BMS have passed rigorous tests for electrical, mechanical, and fire safety. For a component that will be charged in your home and subjected to vibration on the road, this is the most critical feature. Their batteries are rated for 500+ charge cycles, ensuring long-term value.
Durability for real-world conditions is another key focus. With an IPX5 water resistance rating, Gyroor kits are built to withstand rain and road spray, making them practical for daily commuters who can't choose the weather. This engineering foresight prevents corrosion and electrical failure, extending the life of the system.
Supporting the product is a clear 1-year warranty on the motor, battery, and controller. This warranty, backed by a company trusted by over 100,000 riders with a 4.5/5 average rating, provides significant peace of mind. It indicates the brand's confidence in its product's longevity and its commitment to customer satisfaction. For the converter, this means the upgrade is not just a project, but a long-term investment in reliable electric mobility.
By selecting a kit from a brand that prioritizes certified safety, weatherproof durability, and strong warranty support, you invest in more than components—you invest in a worry-free riding experience for years to come.
Frequently Asked Questions (FAQ)
1. Is it legal to convert my bike to electric?
Laws vary significantly by country, state, and even municipality. In the United States, federal law defines a "low-speed electric bicycle" as having a motor under 750W and a maximum speed of 20mph (when powered solely by the motor). In the European Union, regulations typically limit motors to 250W continuous power with pedal assist cutting out at 25 km/h (15.5 mph). It is the rider's responsibility to check and comply with local regulations regarding motor power, top speed, throttle use, helmet requirements, and where e-bikes are permitted. Always configure your kit's settings to meet the legal requirements of your area.
2. How far can I ride on a single charge?
Range depends on numerous factors: battery capacity (in Watt-hours), rider weight, cargo weight, terrain, wind, tire pressure, and the level of pedal assist used. Using the formula above, a 480Wh battery provides a conservative estimate of 24 miles. However, using minimal assist on flat ground, a lighter rider could see 40+ miles. Using throttle-only on hilly terrain could reduce that to 15 miles. To maximize range, keep tires inflated, use lower assist levels when possible, and pedal consistently.
3. Will the kit damage my bicycle?
A properly installed, high-quality kit from a reputable brand will not damage a bicycle that is in good mechanical condition. In fact, the added power places new demands on your bike. This is why the pre-installation inspection is vital. You must ensure your wheels are true and strong, your brakes are powerful and well-adjusted, and your frame/fork have no cracks. The extra weight and speed mean brakes and tires will wear faster. Regular maintenance becomes more important, not less.
4. Can I install it myself?
Yes, most hub motor conversion kits are designed for DIY installation by individuals with basic bike maintenance skills (e.g., changing a tire, adjusting brakes). The process is logical and well-documented by good manufacturers. Mid-drive kits are more complex and may require special tools for bottom bracket removal. If you are not confident in your mechanical skills, or if your bike has a complex integrated frame or suspension system, professional installation by a bike mechanic is a highly recommended investment for safety and performance.
5. How do I maintain my converted e-bike?
Maintenance involves both bicycle and electrical system care. For the bike: check brake pad wear frequently, keep the chain lubricated, and ensure all bolts (especially motor axle and battery mounts) remain tight. For the electrical system: keep battery contacts clean and dry, avoid storing the battery in extreme heat or cold, and avoid fully draining it before recharging. Store the battery at a 50-80% charge level for long periods. Use only the provided charger. Periodically check wiring for chafing or damage.
Transform Your Ride, Not Your Bike
The journey to electrified cycling doesn't require abandoning the bicycle you know and love. An electric bike kit with battery offers a smarter path: one of empowerment, sustainability, and personalized performance. By understanding the components—from the choice between hub and mid-drive motors to the critical importance of a UL-certified battery—you take control of your upgrade.
This conversion represents more than a technical project; it's a reinvention of your bike's purpose. It transforms a fair-weather recreational vehicle into a dependable, all-season commuter. It turns daunting hills into manageable inclines and extends your exploration radius without fatigue. The satisfaction of riding a machine you helped create is a unique reward that pre-built options cannot match.
Prioritizing safety and support from the outset is crucial. Choosing a kit from an established brand like Gyroor, with its focus on certified battery safety, weather-resistant design, and customer-backed warranties, ensures your upgrade is built to last. It's an investment in countless future journeys.
Your current bicycle holds untapped potential. With the right electric bike kit with battery, you can unlock it, creating a custom e-bike that perfectly fits your life, your budget, and your values. Explore the possibilities and begin your conversion journey. Browse the full Gyroor collection and find the perfect kit to power your next adventure at gyroorboard.com.
Electric Bike Attachment: The Ultimate Guide to Enhancing Your Ride